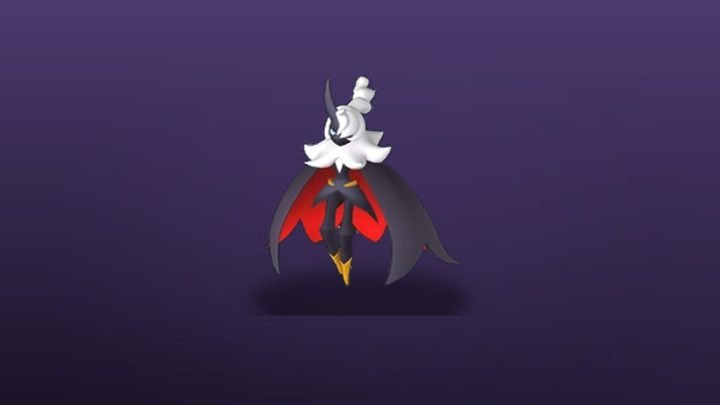
Auri and Shaolong are the new Palworld 1.0 boss pair guarding Sunreach Tower. This is a two-phase fight: Auri (Electric/Dragon) first, then Shaolong (Fire/Dragon). Unlike the original tower bosses, the Sunreach pair shares a health pool — damage to either counts toward the total. This guide covers the gear, team, and positioning you need to clear the fight.
Fight Overview
| Auri (Phase 1) | Shaolong (Phase 2) | |
|---|---|---|
| Element | Electric / Dragon | Fire / Dragon |
| Weak to | Ground, Ice | Water, Ground |
| Level | 50 | 50 |
| HP pool | Shared — approximately 80,000 total | |
| Enrage | Both enrage at 30% remaining HP, gaining +30% ATK and reduced cooldowns | |
Preparation
Recommended Level
Player level 48+ with Pal team members also at level 48+. Fight is doable at 45 with perfect gear, but will be significantly harder.
Gear Checklist
- Armor: Heat-resistant Metal Armor (for Phase 2’s fire AoE) or the new Sunreach set if you’ve explored enough to craft it
- Shield: Hyper Shield or better (2,000+ capacity)
- Weapon: Rocket Launcher (for opening burst) + Assault Rifle (for sustained damage)
- Consumables: 10+ Pizza (HP regen), 5+ Advanced Healing items, 3+ Revival items
Recommended Team
| Pal | Role | Reason |
|---|---|---|
| Frostallion / Glacier / Nivalex | Main DPS (Phase 1) | Ice is strong against Auri’s Electric/Dragon combo |
| Jormuntide / Tsunami | Main DPS (Phase 2) | Water beats Shaolong’s Fire element |
| Jetragon / Terradon | Mobility + burst | Ground-type for neutral coverage; high mobility to dodge AoE |
| Any healer/support Pal | Recovery | Teardragon or similar healing skill (optional but helpful) |
Phase 1: Auri
Key Attacks
- Thunder Strike: Auri summons lightning bolts in a large AoE centered on itself. Telegraphed by a 2-second charge. Run away from Auri when you see the charge animation.
- Dragon Breath (Electric variant): A cone attack that deals Electric damage over 3 seconds. Strafe sideways — don’t run backward, the cone tracks forward movement.
- Static Field: Places a persistent electric field on the ground that lasts 20 seconds. Avoid standing in it; it slows and damages.
Strategy
- Open with Rocket Launcher — fire 2-3 rockets as soon as the fight starts while Auri is still in its intro animation.
- Deploy your Ice Pal (Frostallion or equivalent) — Ice skills hit for 2x damage against Auri.
- Stay at medium range — close enough to hit with your Assault Rifle, far enough to dodge Thunder Strike.
- Kite when Static Field is up — move to the opposite side of the arena.
- Call your Pal back if it gets hit by Thunder Strike twice consecutively — let it recover, then redeploy.
Phase 2: Shaolong (Starts at ~50% HP)
Shaolong enters the fight when Auri’s HP drops below 50%. Now both bosses are active simultaneously. The good news: they share a health pool, so damage to either boss counts. The bad news: you’re now dodging two attack patterns.
Key Attacks (Shaolong)
- Inferno Blast: Wide fire cone that leaves burning ground for 15 seconds. Same as Auri’s breath but fire-element and slightly wider.
- Meteor Shower: Shaolong leaps up and rains fire projectiles across the arena. Each impact leaves a small burning zone. Start sprinting as soon as Shaolong jumps; don’t stop until the meteors stop falling.
- Dragon Roar (enrage only): Both bosses roar, dealing moderate AoE damage and applying a temporary DEF debuff. Use a healing item immediately after.
Strategy (Phase 2)
- Swap to Water Pal (Jormuntide / Tsunami) as soon as Shaolong appears.
- Position yourself so the bosses are lined up — this lets you hit both with AoE skills and makes it easier to track both attack telegraphs.
- Prioritize dodging Meteor Shower over everything else. It’s the attack that will kill you.
- Use your Rocket Launcher when both bosses are grouped.
- Save one Revival item for the enrage phase — you’ll need it.
Enrage Phase (30% HP)
Both bosses enrage simultaneously. Their attack speed increases, cooldowns decrease, and Dragon Roar starts cycling every 20 seconds. This is the “do or die” phase:
- Pop all remaining damage buffs — food, skills, whatever you have.
- Keep moving — never stand still for more than 2 seconds.
- Accept that your Pal will faint multiple times — just redeploy as fast as the cooldown allows.
- Finish with Rocket Launcher spam if your weapon skills are on cooldown.
Rewards
| Reward | Quantity | Notes |
|---|---|---|
| Ancient Technology Points | 10 | Same as other tower bosses |
| Life Crystals | 3-5 | Needed for Mutation Elixirs |
| Sunreach Core | 1 | Crafting material for Sunreach-tier gear |
| Technical Manual | 1 (guaranteed first clear) | Unlocks Sunreach technology schematics |
FAQ
Can I solo this fight?
Yes, but it’s significantly harder than soloing the original tower bosses. Bring max gear and a well-leveled Pal team. The enrage phase is where most solo attempts fail.
Do I need to beat Sunreach Tower to access the rest of the islands?
No. The tower is optional content. You can explore all floating islands and farm Hexolite Quartz without ever entering the tower.
Can I retry if I wipe?
Yes. The tower has no lockout or entry fee. You can re-enter as many times as you need, with no health or item penalty beyond what you consumed during the attempt.
Is the fight different in multiplayer?
Yes. In multiplayer, Auri and Shaolong gain approximately 50% more HP per additional player. The enrage threshold stays at 30%, but the enrage duration is longer. Coordination is important — assign one player to focus on AoE clear while the others focus DPS.
Related guides: Sunreach Overview | How to Reach Sunreach | All Tower Bosses Order